Friday, November 26, 2010

Chicken Fried Steak

I watched the episode of Bobby Flay's Throwdown! for Chicken Fried steak several months ago.  In the episode, Bobby challenged Paula Deen to making the best Chicken Fried Steak.  As usual, the show was full of drama, but in the end, Paula Deen came out victorious with the following Chicken Fried Steak recipe.  Now, I am no expert on making Southern food (I am actually must better at desserts) but in honor of the southern cooking, I decided to try my hand at this recipe. 

 Ingredients

  • 1 1/2 cups, plus 2 tablespoons all-purpose flour
  • 1/2 teaspoon freshly ground black pepper
  • 8 (4-ounce) tenderized beef round steak (have butcher run them through cubing machine)
  • 1 teaspoon House Seasoning, recipe follows
  • 1 teaspoon seasoning salt
  • 3/4 cup vegetable oil
  • 1 1/2 teaspoons salt
  • 4 cups hot water
  • 1/2 teaspoon monosodium glutamate (optional)
  • 1 bunch green onions, or 1 medium yellow onion, sliced

Directions

Combine 1 1/2 cups flour and 1/4 teaspoon of pepper in a small bowl. Sprinkle 1 side of the meat with the House Seasoning and the other side with the seasoning salt, and then dredge the meat in the flour mixture. Heat 1/2 cup oil in a large heavy skillet over medium-high heat. Add 2 or 4 of the steaks to the hot oil, and fry until browned, about 5-6 minutes per side. Remove each steak to a paper towel-lined plate to drain. Repeat with the remaining steaks, adding up to 1/4 cup more oil, as needed.
Make the gravy by adding the 2 tablespoons remaining flour to the pan drippings, scraping the bottom with a wooden spoon. Stir in the remaining 1/4 teaspoon pepper, and the salt. Reduce the heat to medium and cook, stirring frequently, until the flour is medium brown and the mixture is bubbly. Slowly add the water and the MSG, if using, stirring constantly. Return the steaks to the skillet and bring to a boil over medium-high heat. Reduce the heat to low, and place the onions on top of the steaks. Cover the pan, and let simmer for 30 minutes.

House Seasoning:

  • 1 cup salt
  • 1/4 cup black pepper
  • 1/4 cup garlic powder
Mix ingredients together and store in an airtight container for up to 6 months.
Yield: 1 1/2 cups 

I think I need to practice cooking more.  When I originally started this blog, one of my goals was to become a better cook, but somehow it morphed into me baking A TON.  Anyways, I had the bf over and we made this meal together.  He made the Mac and Cheese (which turned out fantastic btw) and I made the Chicken Fried Steak.  Being my usual self, this recipe took me two attempts to achieve success.  I bought the wrong cut of meat initially.  I thought that cubing meant actual cubes of meat and I tried to make actual steak using cubes.  This failed miserably.  Thinking back on it, it is actually quite amusing that I thought it would somehow conglomerate and work.  Lol.  At the time though, I was a little upset that I bought the wrong cut.  Cubed steak actually is as follows: Round Cube Steak.  Once I bought the correct meat, the recipe went swimmingly.  It was surprisingly easy to make. 

Overall, I give this recipe 3.75 out of 5 stars.  I made the recipe without MSG.  One of my complaints with the recipe was the amount of House seasoning you make above.  It is a ridiculous amount.  Cut it down by at least one fourth of that and that is how much is actually necessary for this recipe.  However, despite my complaints, the steaks tasted pretty good.  The breading managed to stay on and the brown gravy was an excellent addition in small quantities to the steaks.  I hope to try my hand at more cooking in the near future.  :)      

Friday, November 19, 2010

Lemon Bars

I have been trying to expand my repertoire beyond the regulars.  I found this recipe on the Food network's website it is by Ina Garden.  Why Lemon...well one it is a sour fruit that fills desserts with a goodness that can't be matched by anything else.  I hope you enjoy making these Lemon Bars as much as I did.


Ingredients
For the crust:
1/2 pound unsalted butter, at room temperature
2 cups flour
1/2 cup granulated sugar
1/8 teaspoon Kosher salt

For the filling:
6 extra-large eggs at room temperature
3 cups granulated sugar
2 tablespoons grated lemon zest (4 to 6 lemons)
1 cup freshly squeezed lemon juice
1 cup flour
- Confectioners' sugar, for dusting

Directions
1. Preheat the oven to 350 degrees F.
2. For the crust, cream the butter and sugar until light in the bowl of an electric mixer fitted with the paddle attachment.  Combine the flour and salt and, with the mixer on low, add the butter until just mixed.  Dump the dough onto a well floured hands and press it into a 9 by 13 by 2 inch baking sheet, building up a 1/2 inch edge on all sides.  Chill.
3. Bake the crust for 15 to 20 minutes, until very lightly browned.  Let cool on a wire rack.  Leave the oven on.
4. For the filling, whisk together the eggs, sugar, lemon zest, lemon juice, and flour.  Pour over the crust and bake for 30 to 35 minutes, until the filling is set.  Let cool to room temperature.
5. Cut into triangles and dust with confectioners' sugar.

I made these lemon squares several weeks ago and I give them a 3.7 out of 5.  The squares were good, but I was a little weird-ed out  by the lemon zest within the bar itself.  Was it really necessary to bite into lemon zest?  Did it really add that much to the flavor?  To answer these questions, I surfed the web... Lemon zest is the skin of a lemon peeled with a specific grater.  Apparently, the zest contains an oil that adds a specific flavor to food.  As it is cooked, it releases the oil into the food making it awesome.  Some websites say it is ok to use an oil substitute for zest, but I am skeptical.  I may have to test it out.  In addition, there is a small chance...just a small one that I am not grating my lemon zest thin enough?  Any thoughts? My second thoughts on the bars was they were a little too lemony.  I know the name is Lemon Bar, but I think there could have been a balance.  Despite all of my negative comments, the bars are quite tasty, unhealthy and fun to eat.  Enjoy!

Friday, October 22, 2010

Pumpkin Cookies with Brown Butter Icing


     About two weeks ago, I went to visit my family in San Antonio for a couple of days.  My mother's kitchen is just so much better than my own.  For this reason (and the seemlingly endless supplies), I always feel the need to cook while I am there.  I will have to post of picture of my small kitchen sometime soon so that you guys can see the tight quarters that I am working in.  Going home though, reminds me that I hope someday I will have a kitchen as nice as hers except with gas appliances.  Maybe this doctor thing will eventually pay out after all of these sleepless nights and countless hours in books?  LOL.  Anyways, to celebrate the wonderful weather that we have had in Texas this October and the feeling of fall, I decided to make Pumpkin Cookies with Brown Butter Icing from the Martha Stewart Cookie book.     

Above: My mom decided to take a picture of me icing the cookies.

Given the fact that I have already posted several of her recipes on my site.  I am only going to post a link to the recipe that I found on her website for the recipe.  Pumpkin Cookies with Brown Butter Icing Recipe

Overall I give these cookies 4.2 out of 5 stars. They were simply delightful and I couldn't help eating them even if I tried to stay away from them. My favorite thing about these cookies was how incredibly soft they were! They simply broke apart... I am not going to lie...this characeristic was slightly magical. The brown butter icing tasted a little like cinnamon roll icing. It was really sweet...almost too sweet alone. However, it melded well with the cookies when I put them together and the cookies balanced the sweetness. When I make this recipe again, I may try to cut the recipe in half. The recipe produces TONS of cookies.  I was overloaded with cookies afterwards that even after giving away half of them, I still had cookies to eat a week later.  Craziness!  I highly recommend trying to make these cookies especially in the spirit of the fall season.  Enjoy!

Monday, October 18, 2010

Snicker's Cupcakes

I had this past Sunday off from work and was in the mood to bake.  I seized this rare opportunity to tackle a recipe that looked like it would take several hours of my time.  I have been reading Annie Eat's blog quite a bit lately and I have been wanting to tackle some of her scrumptious looking recipes.  An aside from baking altogether, just saying the word scrumptious reminds me of the 1968 film Chitty Chitty Bang Bang.  I watched the movie over and over again when I was a kid.  There is a song in the movie where Dick Van Dyke sings about the female lead being "Truly Scrumptious".  Truly Scrumptious Video  Anyone remember this scene?  :)  The thought of the movie brings back good memories and I hope these Snicker Cupcakes from Annie Eat's blog are a scrumptious as my memories of the movie are.  Maybe they will be "Truly Scrumptious"...who knows...


Recipe from Annie Eat's
Ingredients:
For the cupcakes:
½ cup Dutch-process cocoa powder
½ cup hot water
2 cups all-purpose flour
¾ tsp. baking soda
¾ tsp. baking powder
¾ tsp. coarse salt
16 tbsp. unsalted butter
1½ cups sugar
2 large eggs plus 1 egg yolk
1¾ tsp. vanilla extract
2/3 cup sour cream, at room temperature
For the caramel sauce:
8 tbsp. unsalted butter, cut into pieces
1 cup sugar
1 cup heavy cream
¼ tsp. vanilla extract
Pinch of salt
For the filling:
24 fun-size Snickers bars, chopped
For the frosting:
16 tbsp. unsalted butter, at room temperature
1 lb. confectioners' sugar
1½ tsp. vanilla extract
1/3 cup caramel sauce
Pinch of coarse salt
2 tbsp. heavy cream
For garnish:
8 fun-size Snickers bars, chopped

White Chocolate Raspberry Cheesecake

I have only made cheesecake once.  About two years ago, I made a chocolate cheesecake for a friend from Cooking Light.  My mom recently bought me a cheesecake pan from Ross and I have yet to use it.  Mitchell mentioned on our camping trip that he really liked White Chocolate raspberry cheesecake from the Olive Garden.  So I have been meaning to make a cheesecake for multiple reasons for a while now.  So when Mitchell was in town last month, I wanted to make this particular White Chocolate raspberry cheesecake.  I found the recipe by typing White Chocolate raspberry cheesecake from the Olive Garden in google and it was one of the first websites to pop up.  He helped me make this delicious creation. 


Wednesday, September 29, 2010

Caramel Popcorn Ice Cream

 About a month ago, Mitchell sent me a recipe from a South Carolina cookbook that he owns.  The recipe was for Caramel Popcorn ice cream.  Sounds like interesting all in one combination, right?  Caramel...good.  Ice Cream...good.  Popcorn...amazing!  The three things just don't seem to mix when you first think of them.  However, how could these three things together not be good?  Anyways,  Mitchell was in town last weekend and we decided to make the ice cream together.  : )  Below is the recipe and the results of our taste test follow: 


For the ice cream:
1 1/4 cups heavy cream, plus more if needed
3/4 cup whole milk, plus more if needed
1/2 cup granulated sugar
1 tablespoon light corn syrup
1 tablespoon vanilla extract
1 bag popped extra buttery popcorn
8 egg yolks

For the caramel popcorn:
1 1/2 cups granulated sugar
1 bag popped extra buttery microwave popcorn
Pinch of kosher salt

Special equipment: ice cream maker

Directions:
1. To prepare the ice cream, combine the heavy cream, milk, 1/4 cup granulated sugar, corn syrup, and vanilla extract in a large sauce pot and bring to a boil over high heat, stirring to combine.  The second it comes to a boil, remove it from the heat and stir in the bag of popped popcorn.  Set aside and allow the mixture to steep and absorb the popcorn flavor for 20 minutes, stirring occasionally.  After it is steeped, strain the mixture through a fine sieve, discarding the solids.  Measure the strained liquid.  You're shooting for a total of 2 cups liquid.  If what you have is shy of that amount, add equal parts of heavy cream and milk until you get there.  Return the liquid to the sauce pot and bring to a boil over medium-high heat, being careful not to scorch.

2. Combine the egg yolks and the remaining 1/4 cup sugar in a large bowl.  Whisk vigorously until the mixture is frothy, light, and lemon yellow in color.  As soon as the milk mixture reaches a boil, whisk it, in a slow and steady stream, into the egg and sugar mixture.  Whisk until thoroughly incorporated, then return the mixture to the pot.  Cook the custard mixture over medium heat, whisking constantly, until it reaches 180 F and coats the back of a spoon.  (Be careful here.  If the custard gets too hot or if you stop whisking, you could end up with a pot of sweet scrambled eggs.)  Remove the custard from the heat, strain through a fine-mesh sieve, and refrigerate in a covered bowl overnight.

3.  Meanwhile, prepare the caramel popcorn.  Prepare and ice bath in advance, combining a large bowl of ice with a bit of water, to stop the caramel from cooking once it's prepared.  In a medium sauce pot, heat 3/4 cup sugar over medium-high heat.  Once it's melted, add the remaining 3/4 cup sugar.  Stir gently with a flat-edged wooden spoon, being careful not to burn the sugar.  The sugar is caramelized when it has turned a dark amber or light to medium brown color.  At this point, remove the pot from the heat and immerse it in the water bath for 5 to 10 seconds.  Remove from the bath and stir in the popcorn, gently stirring to fully coat.  Pour the popcorn out onto a parchment lined sheet pan and spread out with a wooden spoon.  Sprinkle lightly with kosher salt.  When it's moderately cool (but not cold) remove the popcorn from the pan, breaking into individual kernels and discarding any unpopped corn.

4. To finish the ice cream, freeze the cooled custard according to your ice cream machine's instructions.  After it's done setting up in the machine,  stir in the caramel popcorn, reserving 1 cup for garnish.  Return the ice cream to the freezer to harden.  When it's reached ice cream consistency, serve.  Place 2 or 3 scoops in each bowl and drizzle with the reserved caramel popcorn.

This is a fairly time intensive recipe to be warned.  It was so much fun making it with Mitchell.  He really helped me not miss any steps.  (If you read most of my blog entries, you will see how this happens occasionally to me!  I attribute this more to not reading ahead in the recipe though!)  Anyways, our little adventure in ice cream making went well.

Overall, I give this recipe 4.0 out of 5 stars.  I was surprised how good it tasted with such a weird combination of ingredients.  The ice cream itself tastes a great deal like a custard and the caramel was surprisingly easy to make.  Popcorn in the ice cream is seemingly easy to eat.  You don't have to worry about the ice cream getting hard with the popcorn inside.  The ice cream is soft and easy to eat.  I now want to go to South Carolina and try the real deal.  I wonder whether the real deal is as good as the recreation we made?

Sunday, September 26, 2010

Cookies and Cream Cupcakes

Aww Cookies and Cream cupcakes.....  One of my good friend's recommended this recipe from Annie's Eats.  Earlier this year I made a Cookies and Cream cake that was awesome.  I thought creating cupcakes that were of a similar genre sounded like a good idea.  Why not right?


Click link to read more about this awesome recipe...

Sunday, September 5, 2010

Ultimate Banana Bread

Out of breakfast food, I pondered what I was going to eat.  The decision was made to make banana bread.  Now, my mom makes banana bread quite frequently at home.  I remember many days coming home from school to the smell of the bread coming out of our oven.  When I saw this recipe in the Cook's Illustrated magazine, I wondered how it would differ in taste from my mom's recipe.  I had to make it.  My desire to make this recipe grew stronger as I read the article about the bread in the magazine.  You see Cook's Illustrated goes through great detail of how it experimented to obtain a certain taste.  The author in the article goes through great length to describe how most banana bread recipes don't actually taste like banana.  I always thought my mom's tasted like banana or maybe, growing up eating it, I came to associate the taste of bananas with banana bread.  The mere concept that there were bananas in may have convinced me at an early age that it tasted like banana... I had to know whether I had been brainwashed!  Here's to making BANANA BREAD :)

From Cook's Illustrated July/August 2010

Ingredients
1 3/4 cups unbleached all purpose flour
1 teaspoon baking soda
1/2 teaspoon salt
6 large very ripe bananas peeled
8 tablespoons (1 stick) unsalted butter, melted and cooled slightly
2 large eggs
3/4 cup packed light brown sugar
1 teaspoon vanilla extract
1/2 cup walnuts, toasted and coarsely chopped (optional)
2 teaspoons granulated sugar

Directions
1. Adjust oven rack to middle position and heat oven to 350 F.  Spray 8 1/2 by 4 1/2 inch loaf pan with nonstick coating spray.  Whisk flour, baking soda, and salt together in large bowl.
2. Place 5 bananas in microwave safe bowl; cover with plastic wrap and cut several steam vents in plastic with paring knife.  Microwave on high power until bananas are soft and have released liquid, about 5 minutes.  Transfer bananas to fine mesh strainer placed over medium bowl and allow to drain, stirring occasionally, 15 minutes (you should have 1/2 to 3/4 cup liquid).
3. Transfer liquid to medium saucepan and cook over medium-high heat until reduced to 1/4 cup, about 5 minutes.  Remove pan from heat, stir reduced liquid into bananas, and mash with potato masher until fairly smooth.  Whisk in butter, eggs, brown sugar, and vanilla.
4. Pour banana mixture into flour mixture and stir until just combined with some streaks of flour remaining. Gently fold in walnuts, if using.  Scrape batter into prepared pan.  Slice remaining banana diagonally into 4 inch thick slices.  Shingle banana slices on top of either side of loaf, leaving 1 1/2 inch wide space down center to ensure even rise.  Sprinkle granulated sugar over loaf.
5. Bake until toothpick inserted in center of loaf comes out clean, 55 to 75 minutes.  Cool bread in pan on wire rack 15 minutes, then remove loaf from pan and continue to cool on wire rack.  Serve warm or at room temperature.

Whew...obtaining a banana taste was more difficult than I anticipated.  Microwaving and boiling banana juice... what!   The banana juice was hard work and I am still not sure whether it was worth it.  This was most definitely the fanciest banana bread that I have ever made.  Overall, I give this bread 4.2 out of 5 stars.  Like Cook's Illustrated described it, the bread is moist but not wet.  It melts in your mouth.  Upon cutting the bread did not crumble.  In addition, it tasted more like banana's like the recipe touted it would.  This banana bread recipe was better than my mom's.  This is a hard fact for me to admit.  My mom's recipe is not bad, but it tastes less like bananas and more like butter.  As to whether I would make this recipe again, I am slightly torn.  It was a lot of work for banana bread...I feel like I should have made a gourmet treat in that same period of time.  However, I did enjoy eating the bread every morning for a week.  Happy baking.... 

Sunday, August 22, 2010

Cherry-Streusel Coffee Cake

 I am finally off of night float and I am now working days again.  It took me over a week to reacquainted with the daylight.  With being used to days again, I have more time to bake and more time to exercise.  Prior to call last weekend, I decided that I wanted to bake for the call team.  I picked this recipe from Martha Stewart's Baking Handbook.  The last coffee cake I made I was not that impressed with.  I have had good coffee cakes, but I have never made a good coffee cake.  Hopefully, Martha's recipe won't let me down.


Ingredients
1 stick unsalted butter, room temperature, plus more for pan
2 cups all-purpose flour
1 teaspoon baking powder
1 teaspoon baking soda
1 teaspoon salt
1 cup sugar
2 large eggs
1 teaspoon vanilla extract
1 cup sour cream
1 cup frozen sour cherries, thawed and drained well
1 cup Streusal(see recipe below)
Milk glaze

1. Preheat the oven to 350 F.  Butter a 9-inch tube pan; set aside.  In a medium bowl, sift together the flour, baking powder, baking soda, and salt; set aside.
2. In the bowl of an electric mixer fitted with the paddle attachment, beat the butter, sugar, eggs and vanilla on medium speed until light and fluffy, 2 to 3 minutes.  Add the flour mixture in three parts, alternating with the sour cream and beginning and ending with the flour.  Beat until just combined, scraping down the sides of the bowl as needed.
3. Spoon about half of the batter into the prepared pan.  Arrange the cherries in a single layer on top of the batter; avoid placing any cherries against the pan's edge, as they may stick or burn if  not fully encased.  Top with the remaining batter, making sure it is evenly distributed, and smooth with an offset spatula.  Sprinkle streusel evenly over the top of the batter.
4. Bake until the cake is golden brown and springs back when touched, 40 to 45 minutes.  Transfer the pan to a wire rack set over a rimmed baking sheet, and let the cake cool 10 to 15 minutes.  Invert the cake onto the rack, then reinvert (so streusel side is up), and let cool completely.  Spoon the glaze over the cake, letting drip down the sides.  Let the cake sit until the glaze is set, about 5 minutes, before serving.  Cake can be kept at room temperature, wrapped well in plastic, for up to 4 days.

Milk Glaze
1 cup confectioners' sugar
2 tablespoons milk
In a medium bowl, whisk together the confectioners' sugar and milk until completely smooth.  Immediately drizzle glaze over cake.

Streusel (Makes 4 cups)--> adjust recipe accordingly
2 1/4 cups all purpose flour
3/4 cup packed light brown sugar
2 1/4 teaspoons ground cinnamon
1 teaspoon coarse salt
1 1/2 sticks unsalted butter, room temperature

In a medium bowl, combine the flour, sugar, cinnamon, and salt; cut in the butter using a pastry blender until large, moist clumps form.  Streusal can be refrigerated in an airtight container for up to two weeks.

The fast fact of this blog is the following: The term streusel is German for something scattered or sprinkled.  (which exactly what happens when you eat it.)  So don't expect a dessert topped with streusel to be clean! 

I give this Cherry-Streusel Coffee Cake from Martha Stewart 3.0 out of 5 stars.  It tasted good but I would say it is a mere average recipe.  Despite the cakes average taste, I received good comments on the recipe from people who ate the cake at work.  So it is not a bad recipe.  However, the cake leaves something to be desired.  The cake itself is a bit dry even for a coffee cake.  It only crumbles and is a bit bland tasting as well.  The struesel is too buttery.  All I taste is the butter.  Normally, you can eat the struesel straight off the cake and really enojy it.  I don't like straight up butter without a sufficient sweet taste.  Maybe more sugar would have helped?  Maybe this is just a personal preference?  My favorite part of the cake was the cherries.  I used regular cherries instead of sour ones because I couldn't find sour cherries at the grocery store.  I added too many cherries (as in the whole bag!) but I do not regret this decision at all looking back on it.  The cherries were quite good and I think they could have been even better if I had soaked them in sugar water prior to adding them to the cake.  I do not plan on making this exact recipe again.  Let me know if you have any great coffee cake recipes.  I am in search of one.

Wednesday, August 11, 2010

Chocolate Ice Cream


About a week ago, my next door neighbors and I watched a movie together and made ice cream.  The movie of the night was Whip It.  (Honestly, I think the movie could have been better, but it could have been a lot worse)  So we picked out a recipe on one of the first websites we googled.  I am not going to lie...it is a crazy simple recipe.  But residency has been rough lately and we needed something easy to make.  We made not just any ice cream, but chocolate ice cream.  The inspiration for this ice cream was my friend's new ice cream maker and a strong desire to eat lots of ice cream. 

Ingredients for a batch:
5 tablespoons cocoa powder
1 can condensed milk
1/2 pint whole milk

1. Dissolve the cocoa with a little hot water.
2. When fully dissolved, stir in the milk (condensed and whole milk)
3. Transfer mixture to ice cream maker and follow manufacturer's instructions
4.  During the last 5 minutes add mix-ins (chopped chocolate, cookies, etc)
5. Freeze mixture.

One of the things I really liked about this recipe is the fact that the ice cream did not taste like eggs.  A lot of ice cream recipes call for eggs but if you slightly overcook the eggs....your ice cream tastes eggy. (for lack of a better word)  One thing I don't quite understand is how the substitute of condensed and whole milk is sufficient.  The ice cream tastes wonderful.  I actually have relatively few complaints about it.  The ease and simplicity of the recipe lessen my complaints as well.  I give this recipe 4 out of 5 stars.  However, if you happen to know why this recipe works...please let me know.

Saturday, July 24, 2010

Peanut Butter Cookies

This month has been tough.  Transitioning into residency has been more difficult than I anticipated.  I knew I wouldn't have a life, but I guess I got use to fourth year of medical school.  Anyways, I haven't had any time to bake all month.  I spend most of my free time sleeping honestly and when I am awake, it is at night.  I have though been staring at various recipes that I have been dying to make.  Sarah Yoder gave me a book of recipes from graduation.  She is one of the best bakers I know.  Anyways, some of the recipes are lock and key type recipes and I will never publish them here.  However, some of them are not as secretive.  She gave me some advise that I have tried on several occasions but have been unsuccessful thus far.  This advise was as follows:  If you like a dessert at a restaurant or meal, ask for the recipe.  I was out with my mom a month ago and I tried this...it didn't work, but I will try again.  The worst they can tell you is no right?  :)  Anyways last Christmas, Sarah baked cookies as her gift.  These Peanut Butter Cookies were included in the package.  I remember them tasting quite awesome.  I can only hope that some of her baking skills rub off on me and I can duplicate some her success.


Ingredients
2 cups of Natural Peanut Butter
1 1/2 cups sugar
2 eggs
1 tsp baking soda
1 pinch salt
1 tsp vanilla
24 hershey's kisses(optional)

Recipe:
Stir peanut butter and sugar together until smooth.  Add eggs one at a time.  Mix in baking soda, salt and vanilla.  Chill dough at least one hour.  Preheat oven to 350 F.  Roll dough into balls (makes about 24 cookies); place on cookie sheet.  Flatten gently and bake 6 to 8 minutes.  Allow cookies to cool on cookie sheet about 10 minutes.  Put kiss in cookie center while still warm.

Wow!  These cookies are as good as I remember them and so easy to make.  Literally mixing them was less than a ten minute task.  It's a perfect dessert for a time crunched individual.  I give them 4.5 out of 5 stars. Each bite is of peanut buttery goodness.  The cookies melt in your mouth.  Sarah's tip in this recipe was to use natural peanut butter.  I did and I think it is the key to success.  The peanut butter is more pure tasting in the cookie.  Like usual, better ingredients yield better results.  I am 100% positive that these cookies are absolutely awful for you...they are peanuts and sugar...but who cares right?

Saturday, July 17, 2010

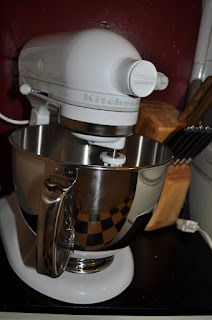
Kitchen Aid


I have been dreaming about getting a Kitchen Aid mixer since before I started this blog.  The amazingness that is associated with the mixer is enough to inspire me three times over to bake.   I am in love with the mixer.  I have already used it several times since I have gotten it despite the fact that my life is over because of residency.  Hopefully, I will post soon some of the awesome things that I am making with it.  I can already state that it has made my baking life 150% better.  (I didn't think it was possible?)

Wednesday, June 23, 2010

Ultimate Lemon Layer Cake

First off, I want to apologize for the delay in post.  I have been trying to squeeze in as much stuff as possible prior to starting residency.  My baking hasn't seized, but my blogging was put on the back burner so I could take the time to see as much of the sun as humanly possible.  Anyways, I picked this recipe Ultimate Lemon Layer Cake recipe out weeks ago specifically for my roommate from college's bachelorette party.  We went camping at Bastrop State Park for her party.  I know you are thinking that the idea of having a bachelorette party in the woods in Texas in the summer may be a little crazy, but the event went wonderfully actually.  It was a little hot...okay a lot hot...but really fun.  Now, I know you probably have a second burning question as you read this.  You took a cake camping?!  My parents thought the idea of taking a fancy cake camping was absurd, but I thought, why not?  So this is a tale of the cake I took camping...I hope you enjoy the recipe.

From March/April 2007 Cooking Illustrated Magazine

                                              Above:  Here I am with the cake finally completed!


Thursday, June 3, 2010

Blog 1 Year Anniversary

So it has been just over a year since I started this blog.  I can't believe how quickly time has flown and how much I have learned in the kitchen this past year.  I thought in the spirit of the blog's one year anniversary that a recap is necessary.  My 5 favorite recipes of the year are going to be listed below.  I hope that if you have tried to make any of the recipes this year off this blog too that you can comment on what your favorite recipe was.

My favorite 5 (in order of what I liked best first)

1. Perfect Chocolate Cake (From January 2010)
-- Chocolate cake is near and dear to my heart.  I made this particular chocolate cake for two close friend's birthdays.  I probably could fill my favorite five recipes of the year with chocolate cakes.  So I am only listing one chocolate cake in this post.  This is my favorite chocolate cake that I made this past year.  A close second is the Triple Chocolate Cake from last July.  Thinking back on this cake I remember how moist and chocolately it was.  In addition, the icing was to die for.  If you make anything off this blog, this is the first thing I want you to make.

2. Perfect Party Cake (From March 2010)
-- I picked out this recipe from one of Dorie Greenspan's books and I made it for a wedding shower.  It was one of the more difficult recipes that I tackled this past year.  Ms. Greenspan's icings are hard to master!  This was probably the prettiest cake that I made this year with the raspberry preserve filling and raspberries to decorate it on the top.  In addition, the slight hint of lemon in the cake was my favorite part.  This cake really lives up to its name.


3. Cinnamon-Raisin Bread (From September 2009)
-- I couldn't leave this bread recipe out of my top 5.  It tastes better than the store bought cinnamon raisin bread by far.  What I remember most about this bread was how the cinnamon sugar dripped out of the bread as you cut it.  Mmmm... I need to make this bread again ASAP!

4. Pecan Crusted Chicken (From June 2009)
-- I thought it would be good to include one non dessert in the top 5.  It was hard for me not to list all desserts.  I kind of like desserts if you couldn't tell.  This pecan crusted chicken was awesome.  I loved the mustard sauce that paired with it too.  Make this recipe when you get an opportunity.  It makes you look like you are a better cook than you actually may be.

5. Chocolate Crackles (From February 2010)
-- I have made this recipe twice and each time loved it.  Thank you Martha Stewart for this recipe.  I could eat these chocolate treats all day.  You eat one and the next thing you know is the five next to them have disappeared.  I swear, I didn't eat them!

Rocky Ledge Bars

Man, it is good to be back in the kitchen baking again.  This is one of the first recipes I read after I returned to China and I made it shortly after I got back.  I picked out this Rocky Ledge Bar recipe from Martha Stewart's cookie book.  I love that book and you should buy it.  Seriously... Almost all of the recipes I have tried in the book thus far have been pretty good.  It is an excellent place to start in the world of baking if nothing else.  So enough with me selling the book, let's move on to baking! 


Ingredients
2 1/4 cups all-purpose flour
2 1/4 teaspoons baking powder
1 teaspoon course salt
1 stick unsalted butter, room temperature
1 1/2 cups packed dark brown sugar
3 large eggs
1 teaspoon pure vanilla extract
1 cup miniature marshmallows
1 cup semisweet chocolate, coarsely chopped
1 cup white chocolate, coarsely chopped
1 cup butterscotch chips
18 soft caramel-candy cubes, coarsely chopped

Directions
1. Preheat oven to 350 F,  Lightly butter a 8 by 13-inch baking pan.  Line with parchment, allowing a 2-inch overhang on the longer sides.  Brush parchment with butter (not the overhang).
2. Whisk together flour, baking powder, and salt in a bowl.  Using a wooden spoon, mix butter and brown sugar in a medium bowl until fluffy, about 2 minutes.  Add eggs and vanilla; mix until well combined.  Fold in half of each of the marshmallows, chocolates, butterscotch chips, and caramel.
3. Spread batter in prepared pan.  Scatter remaining marshmallows, chocolates, butterscotch chips, and caramels on top.  Bake until top is golden brown and a cake tester inserted into center comes out clean,  about 35 minutes (I baked it about 30 minutes**) Let cool on a wire rack.  Lift out of pan, and transfer to a baking sheet.  Refrigerate until set, at least 30 minutes.
4. Remove parchment, and cut into about 16 triangles.  Bars can be stored in a airtight container at room temperature up to 1 week.

The learning issue for this post is slightly random as usual.  However, I haven't used marshmallows in a while and all of sudden they are everywhere in my recipes.  I was wondering what makes a marshmallow and why is it so marshmallowy.

Marshmallows were originally named from the inclusion of marshmallow root in the recipe. Below is a picture of marshmallow root from spiceworld.uk.com. 

The root itself is said to be medicinal and it is said to sooth the throat.  So the original marshmallows made were actually throat lozenges.  What an awesome throat lozenge right?  Candy and no more sore throat= wow!  The use of the marshmallow dates all the way back to Egypt.  In modern times, the marshmallow root has been replaced by unflavored gelatin.  Other ingredients in marshmallows are: corn syrup, sugar, water, and vanilla.

So to evaluate this recipe now. These Rocky Ledge Bars get 4.0 stars out of 5 stars in my book.  The combo of marshmallows, chocolate, butterscotch and caramel are to die for.  Think ooey goey cookie that pull apart with caramel and marshmallow dripping at the sides.  The best part about these brownie type cookie is that it is incredibly easy to make.  It is one of those mix and go recipes.  I will definitely make these again.  I didn't rate these brownies higher though because the cookie itself could be more moist and the brownie itself leaves something to be desired.  If I were to make these again, I would possibly layer the caramel in a different place and possibly change the dough itself.  I would not change the mix in contents of these brownies.  Happy Baking!

Monday, May 31, 2010

Pineapple Upside-Down Cake Adventure

Little did I know earlier this week that I was going to make two different pineapple upside down cakes.   However, I was not satisfied with my first attempt and knew that I could do better.  In addition, I had left over pineapple from the first one and making a second cake just seemed fitting.  This week has been a big week for me.  Two pineapple upside down cakes, med school graduation and lots of friends moving.  I still am in a little shock that I actually graduated med school.  (*Not that I was close to not passing.)   I know I worked hard for it, but I don't feel like I have adequate knowledge still.  There is still so much work left to be done.  For a moment though, it is nice to think that I have finished some of the process and I am trying to enjoy my few weeks off before residency starts.  Anyways, back to Pineapple Upside down cake.  I am going to do a side by side comparison of the two cakes I made...plus discuss what I could have done better in each cake.  The cakes will be discussed in the order that I made them.

Cake #1- Pineapple Upside-Down Cake from William Sonoma Cookbook


Ingredients:
For the Topping
-- 1/2 fresh pineapple, peeled
-- 1/4 cup unsalted butter
--3/4 cup firmly pack brown sugar
For the Cake:
-- 1 3/4 cups unbleached all-purpose flour
-- 1 tsp baking powder
-- 1/4 tsp salt
-- 1/8 tsp freshly grated nutmeg
-- 2 large eggs
-- 2 tsp vanilla extract
-- 3/4 cup unsalted butter, at room temperature
-- 1 cup granulated sugar
-- 1/2 cup whole milk

Directions for Cake #1
1. Preheat the Oven to 350 F.  Lightly coat a 9 inch round cake pan with vegetable oil spray.  (I always coat my pans with butter)
2. Cut the peeled pineapple crosswise into slices 1/2 inch thick.  With a paring knife or small cookie cutter, remove the core from each slice.  Cut the pineapple rounds into half moons and set aside.  (I bought pineapple from HEB that was already peeled for the same price)
3. In a small saucepan over medium heat, melt the butter.  Add the brown sugar and stir until small bubbles appear, 2-3 minutes.  Remove the mixture from the heat and pour into the prepared pan.  Arrange 7-8 pineapple halves in the pan in a circular pattern.  Set the pan aside.
4. To make the cake, in a bowl, mix together the flour, baking powder, salt and nutmeg to distribute the leavening and splice evenly.  Set aside.  In another bowl, whisk together the eggs and vanilla.  Set aside.
5. In a stand mixer fitted with the  paddle attachment, beat the butter until pale and fluffy.  Gradually add the granulated sugar and beat for 2 to 3 minutes longer.  Slowly add the egg mixture, beating after each addition.  Spoon half of the flour mixture into the butter mixture, stir, add half of the milk, and stir again.  Add the remaining flour, stir, and then add the remaining milk.  Continue stirring, scraping down the bowl as needed until the batter is completely smooth.  Do not overmix.
6. Pour the batter on top of the pineapple slices in the prepared pan, spreading it evenly.  Bake until the top of the cake is lightly golden and the center springs back when touched, 35-45 minutes.  Let the cake cool in the pan on a wire rack for 5-10 minutes, then turn out onto a platter and scrape the remaining juices over the top of the cake.  Let cool slightly and serve warm.

Cake #2- Pineapple Upside-Down Cake from Anna Marie Sims.  Given to me by aunt.


Ingredients
1 Yellow Cake Mix
1 Vanilla Instant Pudding- small (or just buy a yellow cake mix with pudding included)
1 1/3 cup water
1/2 cup oil (Canola or Vegetable) 
3 Eggs
1 tsp Vanilla extract
6 Tbsp Butter
1 cup brown sugar
1 14.5oz Can Sliced Pineapple, drained

Directions:
Mix cake mix, pudding, water, oil, eggs, and vanilla extract together until well mixed.  Grease and flour cake pan(s)-- your choice based on cake mix options.  Melt butter in saute pan.  Add brown sugar then slice pineapple.  (Mixture may appear too thick before pineapple is added-- ok).  Pour sugar mixture into bottom of pan(s)-- arrange pineapple.  Add cake batter.

Bake at 350 F for 25 to 30 minutes (or per cake mix instructions).  Test with toothpick to determine readiness.  When ready, remove from oven.  Let cool about 10 minutes.  Loosen edges with butter knife.  Put plate or platter on top of cake pan and flip.  Use fork to remove any topping mix left in pan and put it back on cake.


*Notes on this recipe:
1. I buttered the cake pans with 1 tbsp of butter prior to pouring the sugar mixture into the bottom of the pans.
2. I added the brown sugar to the melted butter i n the saute pan and allowed the mixture to come to a bubble.  This process took 2 to 3 minutes.  Instead of placing the pineapple in the saute pan as the instructions say, I poured the brown sugar mixture into 8 inch pans and then arranged half moon shaped pineapple pieces in the cake pan.
3. I used two 8 inch cake pans and baked each cake close to 40 minutes at 350 F.

Evaluation of the recipes:
Cake #1 aka the William Sonoma Cake: 3.0 out of 5 stars.  I underbaked this cake first off.  So it was too gooey and I was unable to move it to a cake platter.  So I honestly think I need to remake this cake before I give a full evaluation.  The cake in my oven needed probably 45 minutes of solid baking at 350F.  The cake was slightly deceiving in the fact that the top of the cake looked so done and the remainder of the cake, especially the center, was so not done.  So summary...cake was so so.  I even threw out some of the left overs because I wasn't excited about eating it.  This is rare for me.  I almost always finish the cake I make.  :)

Cake #2 aka the cake from my Aunt: 4.5 out of 5 stars.  Despite my aversion to using box cake mixes period, this easy to make cake was significantly better tasting than Cake #1.  It was moister, richer in flavor and the pineapples melted in your mouth.  The cake crumbed in your mouth.  People who ate this cake had extremely positive things to say.  I will definitely make this cake again.  (especially because it was so easy!) It took me less than 15 minutes to prepare prior to putting it in the oven.  This is a rare occurrence. 

Verdict: Cake #2 wins!!!

Monday, May 24, 2010

Thick and Chewy Chocolate Chip Cookies

I finished all of my work for medical school last week.  Now, all I have to do is fill out a couple of forms prior to graduation.  I can't believe that I graduate in less than 2 weeks!  Instead of finishing the forms during the past couple of days.  I choose to go to the lake this past weekend and drive to San Antonio to see my family.  As I write this entry, I am sitting on my parent's couch watching TV.  Ahhh...the life!  Amidst this free time, I choose to go shopping and of course, bake.  I picked this chocolate chip cookie recipe.  This recipe is  from Baking Illustrated from the Editors of Cook's Illustrated Magazine.  The neat thing at about this book is the fact that is goes through a series of reason and taste testings to evaluate the ingredients in the recipe. (Perfect for a science nerd like me!)


For the recipe and evaluation of the recipe...

Sunday, May 9, 2010

Noodle Soup

I know it has been a long time since I last wrote.  I have been out of the country in China and just got back to the US a couple of days ago.  The food was so different in China.  I can't even begin to describe the flavors and tastes that I experienced during the last 5 weeks.  Several entries will be dedicated to China's food.  I want to spend more time learning about their food.  I desperately looked for a cookbook in English while I was in China.  Alas, no success.  I now will scour the internet for books on their food.


My first entry about China will be about one of my favorite meals.  I will discuss all of the weird foods I saw in another entry.  I happened to stay in the city of Xi'an one more day than I originally anticipated.  A full day of wandering the city and exploring, sweet eh?  Xi'an is a city in central China that served as the capital of many previous dynasties.  Prior to my trip to China, I had never heard of the city.  However, Xi'an is actually quite big (+8 million aka two times the size of Houston).  The reason Xi'an has become a hot spot for tourists now is not because of the historical significance of the city, but because of what was found a mere 35 years ago in Xi'an.  In 1974, farm workers digging for a well in the countryside began to find weird things like arrows and broken pieces of pottery.  At first they discounted their findings to be mere junk, but the more stuff they found during the digging the more significant the findings became.  The farmers had actually stumbled upon the tomb of the First Emperor of China from the Qin dynasty.  Within the tomb, the legendary Terracotta warriors were present.  Throughout China's history, legend had told that the first emperor was buried with a life size army and a river of Mercury.  Below is a picture of one of the life size warriors that I took a picture of while I was in Xi'an.  None of the warriors were found intact and each had to be put back together.

Back to food, Xi'an has a large Muslim quarter and for lunch, I decided to explore it.  I found a restaurant with pictures (key in China) and sat down to order.  I decided that I would have what the lady in the next table over was eating.  My inability to learn any Chinese while on the trip was quite astounding.  I found myself resorting to pointing and pantomiming frequently to describe my order at restaurants.

As I sat and waited for my order.  I watched the chef prepare the meal.  This section of China has more noodle makers compared to Eastern China.  The noodle makers are extremely impressive to watch.  One minute you are watching them roll out a simple flour mixture and the next you are watching them fling noodles into creation by folding and flinging the dough.  My mouth must have been close to the floor as I watched this process.  It's magic I tell you.


Less than 5 minutes later, the owner of the restaurant brought me a bowl of noodle soup.  The first thing that popped into my head was, "Am I in the movie Kung Fu Panda or what?"  Haha.  It's funny how you try to make an unusual meal normal in your head.  As I sat down and ate the noodles clumsily (but much improved since the beginning of the month) with my chop sticks, I realized that I have been missing out on awesomeness.  I don't know whether dry noodles from the grocery store will ever be the same.  The fresh noodles slide into your mouth and are more complex tasting than their dry counterparts.  I slurped up the soup by bring the bowl to my mouth.  Unlike in the US, slurping is not considered to be unladylike in China.  However, I don't know whether I want to take notes on manners from the Chinese on everything.  It is not uncommon to hear a grandma hock a lougie right next to you as you walk down the street.  Mixed with the soup what what I thought was beef, green onions, onions and lots of spices that I don't know the names of.  However, I may not be the best judge when it comes to the meat.  I almost ate dog in one of the Hutong restaurants in Beijing because I thought it was beef.


Can I find noodle soup here in the US?  I sure hope so.  If nothing else, I want to learn how to make noodles now.  It's on my cooking bucket list.  Will I be able to fling the noodles like the noodle maker?  Highly unlikely.  I think I will be lucky if I manage to keep the noodles from sticking to the cutting board. 

                                              Above is the restaurant from the outside
I can't wait to write more about my adventure in China and the strange foods that I encountered, and I promise soon that I will write more about the cooking I am doing here at home.  Talk to you soon, Cristina

Fudgy Pudgy Brownies

I lost a bet.  Big surprise, right?  I shouldn't EVER bet.  It is just not a good idea.  I almost ALWAYS lose whether it is nickel betting on dog races or betting who is going to win the Super bowl.  You can almost always bet against me and win your money.  Anyways, I was at the Rodeo watching the wagon races and I picked the wrong wagon.  My payment was Brownies.  I don't consider this much of a payment actually.  :)  I made these Fudgy Pudgy Brownies from Rose Levy Berbenbaum new cake book.  


Ingredients
1 cup plus 2 tablespoons walnut or pecan halves
12 tablespoons unsalted butter
5 ounces fine quality unsweetened chocolate, chopped
3 ounces fine quality white chocolate containing cocoa butter, chopped
3 1/2 tablespoons unsweetened cocoa powder
1 3/4 cups sugar
3 large eggs, at room temperature
1 1/2 teaspoons pure vanilla extract
1/2 cup all-purpose flour, preferably bleached
pinch of salt


Directions

Special Equipment: One 8-inch square baking pan, wrapped with a cake strip, coated with shortening, line with two pieces of crisscrossed parchment paper, attached to each other by a thin coating of shortening, the coated lightly with baking spray flour

Preheat the Oven: Twenty minutes or more before baking, set an oven rack in the middle of the oven and preheat the oven to 325 F (300 if using a Pyrex or dark pan)

Toast and Chop the Nuts: Spread the nuts evenly on a baking sheet and bake for about 10 minutes, to enhance their flavor.  Stir once or twice to ensure even toasting and avoid overbrowning.  If using walnuts, turn them out onto a clean dish towel and rub them in the towel to remove as much skin as possible.  Using a chef's knife, chop the walnuts or pecans in four batches so that they are no larger than 1/4 inch.  Discard any skin.  Note: To avoid creating excess nut dust, do not use the food processor.

Melt the Butter and Chocolates: In a double boiler oven hot, not simmering water, melt the butter, unsweetened chocolate, white chocolate, and cocoa, stirring often.  Scrape the melted chocolate mixture into a large mixing bowl.

Make the Batter: Whisk the sugar into the melted chocolate mixture until incorporated.  Whisk in the eggs and vanilla until the mixture becomes thick and glossy.  Add the flour and salt and stir only until the flour is moistened fully.  Stir in the nuts.  Scrape the batter into the prepared pan and smooth the surface evenly with an offset spatula.


Bake the Brownie: Bake for 30 to 40 minutes, or until the batter has set up 1 inch from the edge and the toothpick inserted one inch from the edge comes out almost clean.  An instant read thermometer inserted in the center will register 190 F.

 These name of these brownies says it all.  The brownies are quite fudgy and will make you really pudgy upon massive consumption.  I love how moist these brownies are and how you can taste the chocolate melting out of them.  Overall, these brownies get 4 out of 5 stars in my opinion.  I think the brownies that I made in February were better than these, but these were still quite good and worth baking.  I made these brownies in March despite the date that they will be coming out on my blog.  I apologize for the delay in this post, but I have been out of the country in Asia.  I will try to post some information about my trip in upcoming posts.  I hope you enjoy making these brownies.

Wednesday, March 17, 2010

President Clinton's Oatmeal Cookies

Every time I get a cookbook, it is a little like Christmas.  I furiously flip through the pages of the book to find my next project and proceed to dream about all of the things I am going to make someday.  Some of these hopes and dreams actually pan out...while others await the day I have more money to fund my baking projects.  Anyways, I was lent several books by my Chef Danny Jacob that I mentioned in a previous post and one of these books was Desserts By the Yard by Sherry Yard.  She is the famous Pastry Chef of a place called Spago in Beverly Hills and is also known for the desserts at the Oscars each year.  In others words, the woman is legendary.  With so many recipes to choose from, I picked her President Clinton's Oatmeal Cookie recipe for my first project out of her book.  Why this recipe you may ask?  Well, I picked this one mainly because I had most of the ingredients in my pantry.


From Desserts By the Yard by Sherry Yard p 250

Ingredients
1 1/2 cups all-purpose flour
1 teaspoon baking soda
1 3/4 sticks unsalted butter, softened
1 cup sugar
1 cup packed light brown sugar
1 1/2 teaspoons freshly grated nutmeg
3/4 teaspoon ground cinnamon
2 large eggs, at room temperature
3 cups rolled oats
1 1/2 cups FAT RAISINS (see recipe for these below)

Directions:
1. Sift together the flour and baking soda and set aside.
2. In the bowl of a stand mixer fitted with the paddle attachment, or in a large bowl with a hand mixer, cream the butter on high speed until lemony yellow, about 2 minutes.  Scrape down the sides of the bowl and the paddle or beaters.  Add the sugar, brown sugar, nutmeg, and cinnamon.  Continue creamin the mixture on high speed until it is smooth and lump-free, about 2 minutes.  Stop the mixer and scrape down the sides of the bowl and the paddle.
3. Add the eggs one at a time, scraping down the bowl and paddle after each addition.  Beat on low speed for 15 to 30 seconds, until the eggs are fully incorportated.  Scrape down the sides of the bowl and the paddle.
4. On low speed, add the sifted flour mixture, beating until all the flour is incorporated.  Scrape down the sides of the bowl.  On low speed, mix in the oats and FAT raisins.
5. With a rubber spatula, scoop out the dough and divide it in half.  Center one half along the bottom of a sheet of parchment paper and roll it up in the paper, creating a log about 2 inches wide and 12 inches long.  Repeat with the second piece of dough.  Fold over the parchment, creating a sausage.  Twist the ends over and wrap in plastic.  Chill the dough logs for a minimum of 1 hour. (At this point the dough will keep nicely, wrapped well in the refrigerator for up to 3 days or the freezer for up to 1 month) You can also simply spoon the dough onto parchment-covered baking sheets and bake at once. (see Note)
6. Place racks in the middle and lower third of the oven and preheat the oven to 350 F.  Line baking sheets with parchment paper.  When the dough is chilled, remove it from the parchment paper.  Using a chef's knife or an offset serrated knife, slice 1/2 inch rounds off the log.  Place the cookies on the prepared baking sheets, spaced 2 inches apart.  Bake for 12 minutes.  Rotate the baking sheets from top to bottom and from front to back, and bake for another 5 to 8 minutes.  remove the cookies from the oven and carefully slide the parchment off the sheets and directly onto your work surface.  Cool the baking sheets between batches.  Wait a minimum of 5 minutes before eating, or allow to cool completely before storing the cookies in an airtight container.
NOTE: Instead of forming the logs and chilling, you can also scoop spoonfuls of dough onto the parchment lined sheets.  Spoon teaspoons for small cookies, tablespoons for large.

Fat Raisins (Note the recipe for this makes 1 cup and the above recipe calls for 1.5 cups
Ingredients
1 cup golden or Red Flame raisins
1/2 cup dry white wine
2 tablespoons fresh orange juice
1 tablespoon dark rum
2 tablespoons sugar

1, Combine the raisins, wine, orange juice, rum, and sugar in a small heavy saucepan, bring just to a boil over medium heat, stirring all the while.  Lower the heat so that the liquid is at a bare simmer and poach for 20 minutes.
2. Remove from heat, cover pan with plastic wrap and allow to cool to room temperature.  Transfer to an airtight container and store in refrigerator up to 2 weeks!

 I want to first start off by saying that I haven't found an oatmeal cookie recipe that I am in love with.  After making these cookies, I am here to tell you that I still haven't found an oatmeal cookie recipe that I am in love with.  However, I did really like the FAT RAISINS in this recipe.  The idea of incorporating a sugary rum mixture into the raisins before using them to bake is glorious.  I think all oatmeal raisin cookies should have some soft of FAT RAISINS.  Overall, I give these cookies 3.4 out of 5 stars.  My biggest complaint about these cookies is they were not chewy enough and I baked each batch for shorter durations in an effort to achieve a softer cookie.  The cookies were too crisp when the directions were followed explicitly.  The recipe called for each batch to be baked close to 20 minutes.  Wow...way to long.  I eventually baked my fourth batch at close to 12 minutes... I don't know what I could have done to create a softer cookie here.  The cookies were cooled in the refrigerator prior to baking too.  If you have any suggestions, let me know.  Also, if you have a favorite oatmeal cookie recipe, please send it my way.  I want to find one that I am pumped about.

Tuesday, March 16, 2010

Tres Leches Cake

Last week, I went to what was possibly the last Houston Dining for Women with the med school gang.  I know I have mentioned Dining for Women in the past, but I don't know if I have been overly specific about what it is exactly.  It is a nonprofit organization that selects other non-profits benefiting women to donate money to.  Essentially, all of the money raised by Dining for Women is done so at small group dinners in which women bring food to the dinner (pot luck style) instead of going out and use the money that they would have spent going out on a non-profit organization.  This month's nonprofit was a group called INMED.  More information can be found: Here at Inmed.org.  Our Houston Dining for Women group has been meeting for about a year and a half and has been a blast thus far.  A great excuse each month to meet up with all of my girlfriends.  This upcoming Thursday, I will find out where I am going to residency, and if I match in a location other than Houston, I plan on starting or joining a Dining for Women chapter in that new city.  Who knows...I may be staying in Houston for residency, but nonetheless, I will continue to carry the Dining for Women torch with whoever is still left here with me.

The theme for this meeting was Mexican Food.  I picked a recipe given to me from my little sister.  She made this Tres Leches Cake for my grandfather's birthday and the whole family is still talking about it.  I figured that if my mom, a non-Tres Leches fan, was raving about it that this recipe had to be good.  So I had the little sis send me the recipe.


From My Sweet Mexico by Fany Gerson as seen in the SA Express News


 For the Cake:
2 cups sifted flour
1 1/2 cups sugar, divided use
1 tablespoon baking powder
1/4 teaspoon salt
1/2 cup vegetable oil
8 eggs, separated
1/4 cup water
1/4 teaspoon vanilla extract
1/2 teaspoon cream of tartar

For Tres Leches:
1 (12 ounce) can evaporated milk
1 (14 ounce) can sweetened condensed milk
1 cup heavy cream
1 teaspoon vanilla extract
1/4 cup dark rum (optional)

Filling and Topping:
2 cups heavy cream
1/4 teaspooon vanilla
1 cup fresh chopped fruit (strawberries and/or canned peaches are commonly used)

For the Cake:
1. Preheat oven to 350 F.
2. Grease two (8-inch) cake pans
3. Put a circle of parchment paper on bottom of each pan.
4. Mix flour, half of sugar, baking powder, and salt in bowl with a whisk until thoroughly combined.
5. Using a whisk, beat vegetable oil, yolks, water and vanilla.
6. Using an electric mixer, beat egg whites to soft peaks, add cream of tartar and second half of sugar and then continue beating until you reach stiff peaks but whites aren't dry.
7. Add 1/4 of the beaten whites to the yolk mixture and fold gently.
8. Add 1/3 of the dry mixture and fold gently.
9. Repeat, alternating finishing with egg whites.
10. Pour into lined pans and bake in middle rack until top springs to touch and a toothpick inserted in the middle comes out clean, about 25 to 35 minutes.
11. Allow to cool slightly and unmold.  Remove parchment paper and return to pans.

For Tres Leches:
1. Mix evaporated milk, sweetened condensed milk, cream, vanilla, rum and salt in medium bowl.
2. Pour half of mixture over one of the cakes and remainder over other cake.  Allow to soak in refrigerator.


For Filling and Topping:
1. Using electric mixer on medium speed, beat heavy cream till it slightly thickens.  Add powdered sugar and vanilla and continue beating until it is thick and fluffy.  The whipped cream should be stable and smooth.


To Assemble Cake:
1. Remove cakes from pans and place some of the whipped cream in the center of one.
2. Put the fruit on top, making sure to spread them evenly.  Top with the other cake and cover with rest of whipped cream.
3. Decorate with fruit as desired.

 I am sure many of you did not grow up with Tres Leches Cake like I did.  I don't remember the first time I had Tres Leches cake actually.  Many people though, have never heard of it or tried it.  So a little info on the cake:
--> It is a very popular dessert in Latin America with its name meaning "Three Milks". 
--> In fact in South Texas, it is many people's favorite dessert; it was my grandfather's.
--> There are rumors that Tres Leches cake was originally invented by the makers of the canned condensed milk to help promote the product in the mid 1800s and other rumors stating that its invention was helped with Nestle during WWII. 

I am going to say it.  I am not a big Tres Leches fan.  Hmmph... I said it. Tres Leches cake with all of the milk is just too rich for me.  This does not fault the recipe though.  This was a great Tres Leches cake.  Wow!  For Tres Leches I give it 4.5 out of 5 stars = goodness.  None of the cake making it out of Dining for Women= good.  Before I evaluate this cake more though, I want to tell you a little story about my own experiences with Tres Leches cake.  I made my very first Tres Leches cake two years ago for a Cinco de Mayo type event.  The cake was a semi-disaster.  Let's just say it was more of a soup than cake.  :)  There was the milk and then a thin layer of cake to go with it.  I am pleased to say that in the past two years that my baking has improved and that this Tres Leches cake was a HUGE hit.  The cake was nice and fluffy and was able to absorb ALL of the milk.  I say that the cake was milky because when you pressed on the cake, milk would slowly seep out.  This is exactly what a Tres Leches cake is suppose to do.  I am pleased with this portion of success.  The cake in the above picture looks poorly decorated and messy....this only occurred because the cake was so moist and milky it was hard to keep the icing on it!  The whipped cream icing was light and melted in your mouth.  If you like Tres Leches cake, I think you should give this recipe a whirl!

Perfect Party Cake

One of my good friends had her bridal shower two weekends ago.  As a bridesmaid, I agreed to help contribute to the party food.  I first made Martha Stewart's Mexican Wedding cookies that I made about a year ago.  (See blog history)  Unfortunately during the making of these cookies, almost everything went wrong!    The first batch I dropped on the ground and in the process losing grip of the cookie sheet, the cookie sheet slid down my arm leaving a significant burn.  I will include a picture of this burn at the end of this entry.  In the second batch, somehow the oven was turned on to broil in the middle of the batch and I subsequently created some pretty black cookies.  :(  At this point, I called it quits and decided that I would try again at a later time.  It just wasn't my night.  The next evening, the night before the shower, I went to work on the Perfect Party Cake by Dorie Greenspan.  I found the recipe in Baking: From My Home to Yours.    My goal was to do better than the previous evening.  (Not a lofty goal in my opinion.)  Below are some pictures of my finished product: the Perfect Party Cake.   


To see Ms. Greenspan's recipe for this cake, you can access it at the following Blog.  I am not going to post the recipe on my blog.  However, I will make comments on the recipe and discuss what I could do to improve it. 


Overall the give this recipe 4.75 out of 5 stars.  I really enjoyed this cake and everyone at the party really enjoyed eating it.  The entire cake was eaten by the next day.  Decorating it with raspberries really made the cake pop and the raspberry preserves were delish.  The cake itself was moist, light and fluffy.  The lemon was not overpowering and was a slight distinct taste.  Mmmm... I ended up using store bought buttercream icing and adding a little lemon extract to the icing to get it a slight lemony flavor.  I tried my hand at the buttercream icing recommended in this recipe, but failed to say the least.  It tasted like straight up butter.  This is the second time that I have had trouble making one of Dorie's complex icings.  I did some further research into icings after my attempt at this one which I will describe below.  My failure in this particular icing was making the meringue prior to mixing in the butter.

The learning issue in this post is buttercream icing.  Prior to this learning issue, I thought there was only one type of buttercream icing.  Buttercream, duh!  However, there are actually six types of buttercream listed on Wikipedia: Simple, Decorator's, Meringue, French, Pastry cream-type, and Fondant-type.  Simple buttercream is powdered sugar with butter.  It is the main type of buttercream that I had made prior to this recipe.  The most common bakery buttercream though is the meringue-type.  The meringue-type involves heating sugar water into a syrup and mixing it into whipped egg whites creating a meringue.  Butter is then added as the meringue cools.  The buttercream in this recipe is the meringue type.  French buttercream is similar to the meringue type except egg yolks are used instead of egg whites.  Pastry cream is used used in the pastry cream type of buttercream.The fondant-type is self explanatory in my opinion--> fondant and butter, and the decorator's type is simple buttercream that is creamed less to create a stiff paste for cake decorations.

Despite my failures though...this cake was a success.  I can't wait to make it again for another party.  It is really and truly the PERFECT Party Cake. 

Below is a picture of my awesome burn....yeah, I hope it doesn't scar too bad.


Thursday, March 11, 2010

Surprise Carrot Cake

With one of my friend's sister, we decided to make this Surprise Carrot Cake out of America's Favorite Brand Name Recipes.  The idea of making a carrot cake sounded good.  I haven't made one since August and the idea of making one sounded good.  I was a little skeptical of the recipe...America's Favorite Brand Name Recipes cook book...not necessarily a tested recipe, but I decided to give it a whirl.


Ingredients
1 8-ounce package Philadelphia Brand Cream Cheese, softened
1/4 cup sugar
1 egg beaten
************************************************
2 cups flour
1 3/4 cups sugar
2 teaspoons baking soda
2 teaspoon cinnamon
1 teaspoon salt
1 cup oil
3 eggs, beaten
3 cups shredded carrot
1/2 cup chopped nuts

Directions
1. Combine cream cheese, sugar and egg, mixing until well blended.  Set aside.
2. Combine dry ingredients.  Add combined oil and eggs, mixing until moistened.  Fold in carrots and nuts.  Reserve 2 cups of batter; pour remaining batter into greased and flour 9-inch bundt pan.  Pour cream cheese mixture over batter; carefully spoon reserved batter over cream cheese mixture, spreading to cover.  Bake at 350 F, 55 minutes or until wooden pick inserted in center comes out clean.
3. Cool 10 minutes, remove from pan.
4. Cool thoroughly  Sprinkle with powdered sugar


Overall, the cake was okay.  I actually blame the recipe this time more than the chefs.  (How unusual right?)  I give this recipe 2.3 out of 5 stars.  The cake was moist but was lacking flavor.  More cinnamon and nutmeg could have been used.  The cream cheese layer at the bottom of the cake wasn't enough.  It too tasted bland.  I think the recipe was executed well.   One thing to note though was I was highly concerned with the layering of the carrot cake batter and cream cheese batter.  The main problem we encountered upon execution of this recipe was covering the cream cheese layer with carrot cake batter.  The cream cheese was lighter than the carrot cake batter layer...so the carrot cake kept sinking beneath the cream cheese.  In the end we managed to get some carrot cake batter on top of the cream cheese batter.  However, I was nervous when I placed the cake in the oven.